
How to Attach and Grow Anubias on Driftwood
Technical Specifications & Benchmark Matrix
- Plant Type
- Rhizomatous epiphyte
- Critical Rule
- Keep the rhizome uncovered; do not bury it
- Scope
- Attachment only; general care, parameters, varieties, propagation and CO2 are on the plant profile
Why Anubias Suits Driftwood and Rock
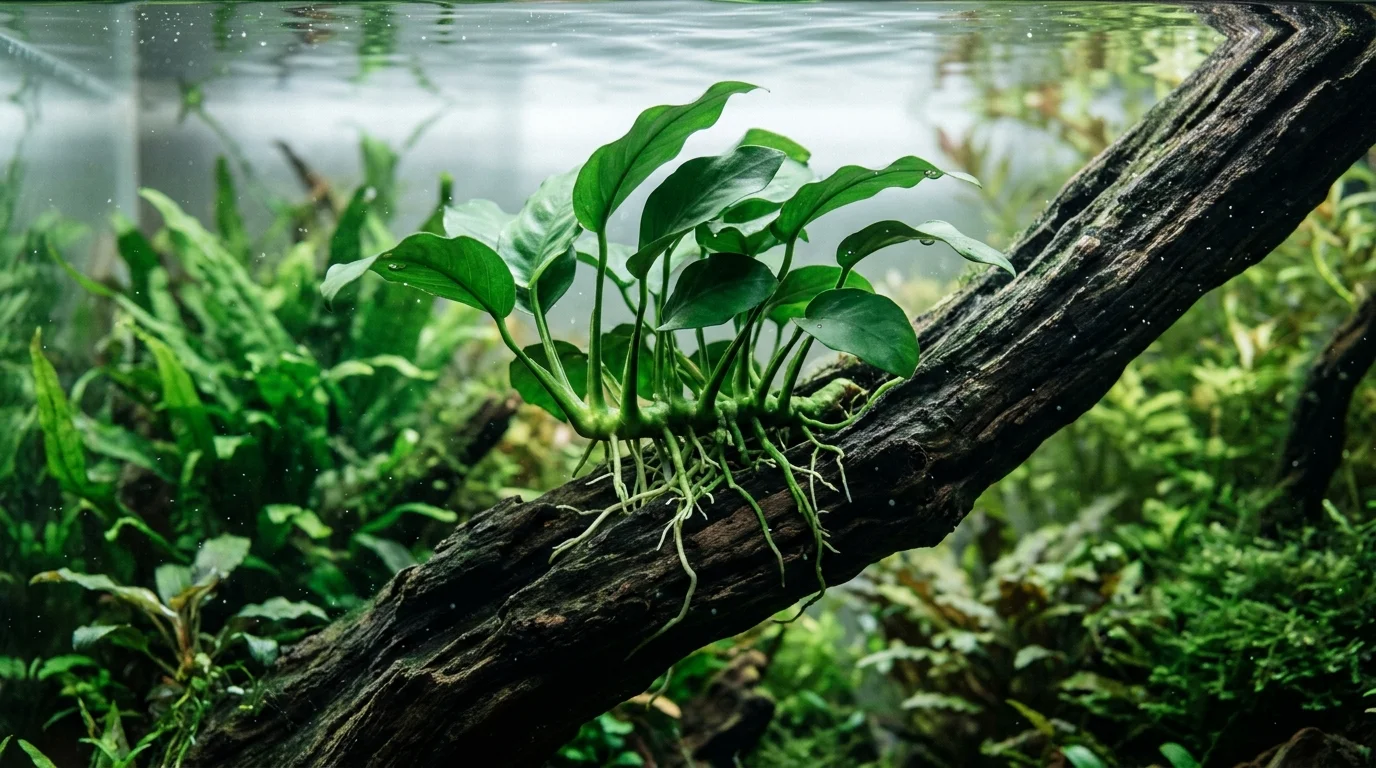
Anubias grows from a rhizome and does not need to be rooted in substrate. It can be anchored to driftwood, rocks or other hardscape instead, and its roots will usually grow onto the surface over time. The one rule that matters most is to keep the rhizome uncovered: burying it is a common cause of rot. For care parameters, size, varieties and propagation, see the Anubias Nana plant profile; this guide covers attachment only.
How to Identify the Rhizome, Roots and Leaves
Check what you are holding before you tie or glue anything.
- Rhizome: the thick, horizontal, stem-like part, often olive to brown, that runs along the base of the plant. Leaves and roots both grow from it. This is the part that must stay uncovered.
- Roots: thinner strands that grow out of the rhizome. They are what grip wood and rock, and on a plant in a pot they are usually tangled in the growing medium.
- Leaves: thick, leathery leaves on individual stalks that rise from the rhizome. Leaves are not the anchor point, so keep ties and glue off them.
If you are buying a plant in a pot, rinse off the growing medium so you can see the rhizome clearly before choosing where to attach it.
Step-by-Step Attachment Methods
All four methods do the same job: hold the rhizome against the surface until the roots grip. Whichever you use, place the plant the way you want it to face, with the rhizome on top of or against the hardscape and not buried in anything.
Method 1: Gel Cyanoacrylate Glue
- 1Choose a cyanoacrylate gel superglue and read its label and instructions, including setting time and any guidance on use in aquariums.
- 2Position the plant on the wood or rock and decide exactly where the roots and rhizome will sit.
- 3Apply a few small drops of gel to the contact point. Use as little as you can, because excess glue tends to leave a white residue.
- 4Press the plant into place and hold it as the product instructs.
- 5Keep glue off the leaves and leaf stalks. Sources differ on whether glue is best applied to the roots or to the underside of the rhizome; in either case, the rhizome itself should end up resting on the surface, not smothered by glue.
Method 2: Cotton Thread
- 1Place the plant on the hardscape with the rhizome against the surface.
- 2Wrap thread around the rhizome and the wood or rock, going between the leaf stalks rather than across them.
- 3Tie it off snugly so the plant cannot slide, but not so tight that the thread bites into the rhizome.
- 4Cotton thread can be left in place, and the roots usually grip over time. Check periodically and replace thread that has loosened.
Method 3: Fishing Line
- 1Use plain monofilament, which is less likely to degrade than cotton and is easy to remove later.
- 2Wrap and tie it as for thread, passing between leaf stalks.
- 3Remove the line once the roots have gripped, so it cannot cut into the rhizome as the plant thickens. Dark line is less visible than clear in many layouts.
Method 4: Wedging Between Rocks
- 1Look for a gap in your rockwork or between a rock and a piece of wood that is slightly narrower than the rhizome.
- 2Gently slide the rhizome into the gap so it is held in place without being crushed.
- 3Make sure the rhizome is still visible and not buried under shifted substrate or other rocks.
Wedging is the gentlest option but relies on the layout staying stable, so it suits rock structures that will not be moved often.
Securing the Plant Without Damaging the Rhizome
A tie should keep the plant from moving, not squeeze it. If thread or line is pulled so tight that it dents the rhizome, loosen it. As the rhizome thickens, check that the tie has not become tight, and remove or replace it if it has. Avoid heavy tension on a single point, and spread the hold over the rhizome rather than around the leaf stalks.
Troubleshooting Attached Anubias
The plant keeps coming loose
Retie or reglue it, or add a second tie to spread the hold. If it keeps slipping, try a surface with a texture or small crevice the roots can grip. Roots tend to take time to grip, so expect to support the plant until they do.
The rhizome has been buried
Uncover it right away. Check the rhizome for soft or mushy sections, which suggest rot, and re-attach the plant so the rhizome sits on top of the surface. Check every few weeks that substrate, moss or other plants have not grown or drifted over it.
Roots are damaged or torn
Handle the plant gently and avoid pulling on the roots. Secure the plant so its weight is not hanging from the damaged roots, and monitor it over the following weeks. If a root is clearly dead or mushy, trim only that part. Replacement roots are likely to grow from the rhizome, though recovery time varies.
You want to move or reposition it
Attached plants can generally be moved for cleaning or rearranging. Cut or remove the old tie or lift the plant gently from the surface, avoiding strong pulling on roots that have gripped, then reattach it in the new spot using the same methods.
Light, Nutrients and Algae on Attached Anubias
Anubias grows slowly, and its long-lasting leaves can collect algae. Avoiding excessive light can help reduce algae, and shaded positions tend to stay cleaner, but light is not the only factor and algae can still appear. Green spot algae, for example, is linked to too much light or an imbalance in phosphate.
Anubias attached to hardscape can obtain nutrients from the water, and it can grow without added fertilizer. A liquid fertilizer is an optional supplement for some tanks, not a requirement, and heavy dosing can encourage algae. For plant-specific feeding and general care, use the Anubias Nana plant profile. If you also keep another rhizome plant, the Java Fern profile covers its care, or see our companion guide on attaching Java Fern to driftwood.
Run Precision Calculations For Your Setup
Check species compatibility, volumetric displacement, and filtration turnover benchmarks for your specific aquarium parameters.
Anubias attachment methods compared
| Method | Best for | What to check | Evidence |
|---|---|---|---|
| Gel cyanoacrylate glue | Hardscape where a quick, firm hold is wanted | Use a few drops; excess leaves white residue; follow the product's setting instructions; keep glue off leaves | Modern Aquarium (2025); Aquarium Co-Op forum (hobbyist experience) |
| Cotton thread | Delicate pieces; removable hold | Snug but not constricting; check periodically for loosening | Modern Aquarium (2025) |
| Fishing line | Larger plants on wood or rock | Remove once roots grip so it cannot cut into the thickening rhizome | Petco care sheet (line to hold a loose plant); forum |
| Wedging between rocks | Stable rock structures | Rhizome must stay visible and uncovered; layout must not shift | No external source found; technique from the site's existing Anubias profile |
Frequently Asked Questions
Which way should I face an Anubias when I attach it?
Does Anubias have to be planted in substrate at all?
How often should I check an attached Anubias?
Where do I find water parameters, size, varieties and propagation?
Sources & References
- Publisher:Modern Aquarium (retailer blog)
- Accessed:2026-10-31
- Publisher:Petco care sheet (publisher and date not shown on page)
- Accessed:2026-10-31
- Publisher:Aquarium Co-Op
- Accessed:2026-10-31
- Publisher:Aquarium Co-Op community forum
- Accessed:2026-10-31